
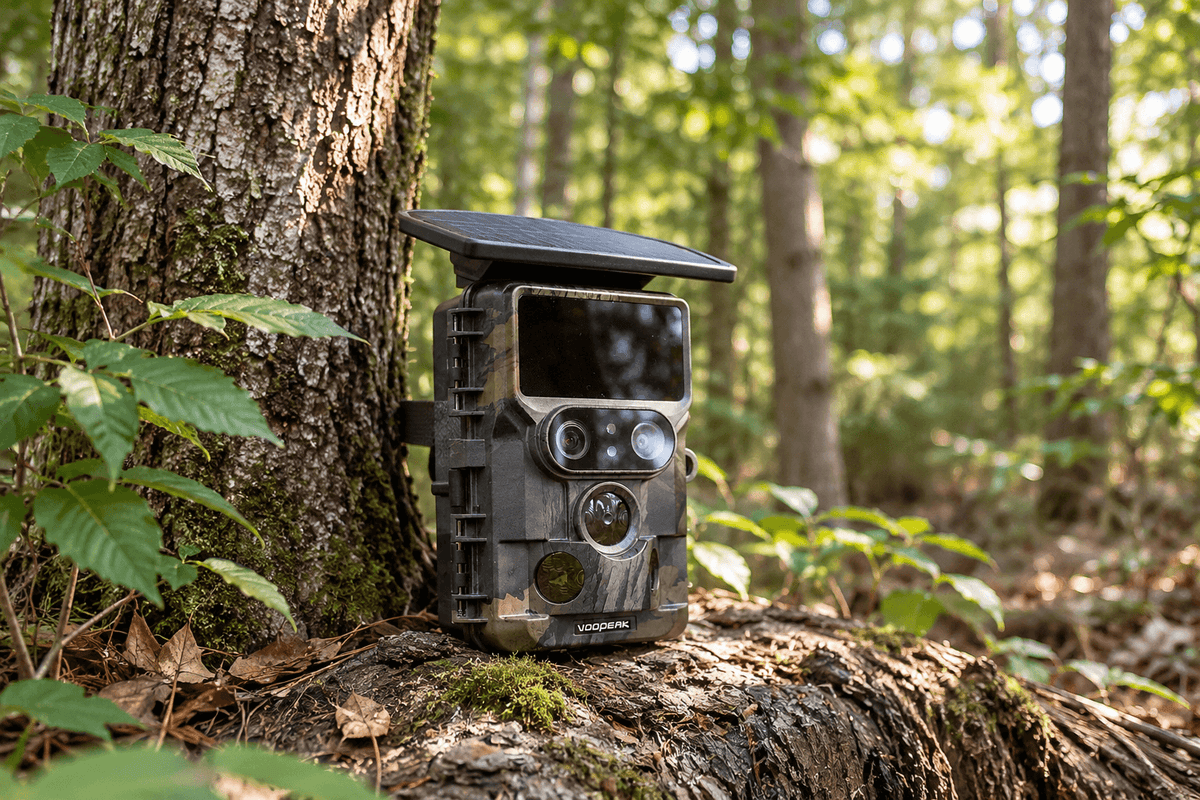
You check your trail camera after several days in the woods, expecting clear pictures of deer, wildlife, or other activity. Instead, you find blurry images, unclear details, or nighttime photos that look washed out. Sound familiar?
If your trail camera photos are blurry, the problem may not be your camera. Incorrect placement, dirty lenses, low batteries, poor lighting, and camera settings can all affect image quality.
The good news is that most blurry trail camera pictures can be fixed with a few simple adjustments.
In this guide, we'll explain the 9 most common reasons trail camera photos look blurry, how to troubleshoot each issue, and how to get sharper daytime and nighttime wildlife photos.
1. A Dirty or Smudged Camera Lens
One of the most overlooked reasons for blurry trail camera pictures is a dirty lens.
Trail cameras are exposed to rain, dust, mud, pollen, spider webs, and moisture. Even a thin layer of dirt or fingerprints can reduce image sharpness and make photos appear hazy.
How to fix it:
- Inspect the camera lens before installation.
- Use a clean microfiber cloth to gently remove dust and fingerprints.
- Check the infrared LED panel and sensor window for dirt.
- Avoid using rough materials or harsh cleaning chemicals.
- Inspect the lens periodically, especially after storms.
A clean lens is one of the easiest ways to improve trail camera image quality without changing any settings.

2. Incorrect Camera Placement and Distance
Camera placement has a major impact on photo clarity.
If your camera is positioned too far away from the target area, animals may appear small and lack visible detail. If it is too close, the subject may fall outside the camera's ideal focus range.
An unsuitable angle can also cause problems, especially when animals move across the detection zone.
How to fix it:
- Position your camera at a suitable distance from animal trails.
- Mount it at approximately waist or chest height, depending on the target species.
- Aim it toward the area where animals are most likely to pass.
- Avoid placing it too close to dense vegetation.
- Take several test photos before leaving the location.
For deer monitoring, placing a trail camera near established trails, feeding areas, or watering spots can help you capture more useful images.

3. Incorrect Camera Angle or Direct Sunlight
Strong sunlight can create overexposed images, glare, and washed-out details. This is particularly common when a camera faces east or west and captures direct morning or evening sunlight.
An incorrect mounting angle can also result in images where the main subject appears poorly positioned or difficult to see.
How to fix it:
- Avoid pointing your camera directly toward the rising or setting sun.
- Whenever possible, choose a north-facing or shaded position.
- Tilt the camera slightly downward if the ground is uneven.
- Make sure nearby branches do not block the lens.
- Test the camera at different times of day.
Good positioning can significantly improve the consistency of your trail camera photos.
4. Low Battery Power
Low battery power is another possible cause of poor trail camera performance.
When batteries become weak, some cameras may experience inconsistent operation, delayed triggers, or reduced flash performance. These issues can contribute to missed shots or disappointing nighttime images.
How to fix it:
- Replace old batteries with fresh, high-quality batteries.
- Check the battery indicator regularly.
- Use the battery type recommended by your camera manufacturer.
- For cameras with external solar panels, ensure the panel receives adequate sunlight.
- Check battery contacts for corrosion or dirt.
If you frequently monitor remote locations, consider a trail camera with a reliable power system or compatible solar charging option.
5. Slow Shutter Speed and Motion Blur
Are animals appearing blurry even when the background looks relatively sharp?
This may be caused by motion blur.
When a deer runs, a bird flies, or another animal moves quickly through the detection zone, the camera may capture movement during exposure. The result is a subject with smeared edges or unclear details.
This problem is especially noticeable in low-light conditions because cameras may need longer exposure times to capture enough light.
How to fix it:
- Choose a camera with a fast trigger speed.
- Use a higher image-quality setting when available.
- Avoid placing cameras in extremely dark areas if possible.
- Use an appropriate capture mode for fast-moving wildlife.
- Check whether your camera offers adjustable shutter or exposure settings.
A fast trigger response helps capture animals before they move out of the frame, while suitable exposure settings help reduce motion blur.
6. Nighttime Infrared Flash Problems

Why are my trail camera photos blurry at night?
Nighttime images can be more challenging than daytime photos because the camera relies on infrared illumination rather than natural light.
If the infrared flash is too weak for the subject distance, details may appear dark, grainy, or unclear. Reflective surfaces, nearby branches, and moisture can also interfere with infrared illumination.
How to fix it:
- Keep the infrared LED area clean.
- Avoid placing branches or tall grass directly in front of the camera.
- Check the recommended nighttime illumination distance.
- Avoid positioning reflective objects close to the camera.
- Test nighttime photos at different distances.
When choosing a trail camera, pay attention to its night vision technology. Low-glow and no-glow infrared systems are useful for wildlife monitoring because they provide nighttime illumination while minimizing visible light disturbance.

7. Condensation, Fog, or Moisture Inside the Camera
If your photos look consistently hazy, especially early in the morning, condensation may be the problem.
Temperature changes can cause moisture to form on the lens or inside the camera housing. High humidity, heavy rain, and improper sealing may also affect image quality.
How to fix it:
- Check the lens for visible condensation.
- Make sure the battery compartment is properly sealed.
- Inspect the waterproof housing and rubber seals.
- Avoid opening the camera in heavy rain or humid conditions.
- Allow the camera to dry naturally in a clean, dry environment if moisture is present.
A weather-resistant trail camera with a properly sealed housing is important for long-term outdoor monitoring.
8. Low Image Resolution or Incorrect Camera Settings
Sometimes, your trail camera is not actually out of focus. The issue is simply that the selected image settings do not provide enough detail.
For example, low-resolution settings may produce images that look pixelated when enlarged. Digital zoom can make the problem even more noticeable.
How to fix it:
- Select the highest available photo resolution.
- Choose the appropriate image quality setting.
- Avoid excessive digital zoom.
- Check whether the camera is saving full-resolution images.
- Make sure you are viewing the original image rather than a compressed preview.
If image detail matters to you, consider a camera that offers high-resolution photography.
For example, the Voopeak TC22 WiFi Trail Camera offers 60MP photos and 4K video, making it a useful option for users who want detailed wildlife images. Its built-in WiFi hotspot also allows convenient local access to captured footage.
9. Slow Trigger Speed or Poor Camera Positioning for Moving Animals
Not every blurry wildlife photo is caused by poor focus or low resolution.
Sometimes the camera simply captures the animal too late.
If an animal moves quickly through the detection zone, a slow trigger response may result in partial images, blurred subjects, or pictures of an empty trail.
How to fix it:
- Choose a trail camera with a responsive trigger system.
- Position the camera at an angle that gives it enough time to detect approaching animals.
- Avoid aiming directly across a busy trail if animals pass very quickly.
- Keep the detection zone clear of unnecessary vegetation.
- Test the camera using several movement patterns.
A well-positioned camera with reliable motion detection can make a significant difference when monitoring active wildlife areas.
How to Get Sharper Trail Camera Photos: A Quick Checklist
Before replacing your trail camera, run through this simple checklist:
- Clean the lens and infrared LED panel.
- Check battery levels and power connections.
- Confirm that the camera is mounted at the right height.
- Adjust the camera angle to avoid direct sunlight.
- Remove branches and grass from the detection zone.
- Select the highest suitable photo resolution.
- Check nighttime infrared performance.
- Inspect the housing for moisture or condensation.
- Take test photos during both daytime and nighttime.
Following these steps can help improve trail camera picture quality and reduce unnecessary troubleshooting.
Choosing a Trail Camera for Clearer Wildlife Photos
If you have tried these troubleshooting steps but still struggle to get clear images, your camera's specifications may be worth reviewing.
When shopping for a new trail camera, consider these important features:
High photo resolution: A higher-resolution sensor can capture more image detail, especially when viewing or cropping wildlife photos.
Fast trigger performance: A responsive detection and capture system helps record animals moving through the detection zone.
Reliable night vision: Good infrared illumination is essential for capturing wildlife after sunset.
Weather-resistant construction: Outdoor cameras need dependable protection against rain, humidity, dust, and changing temperatures.
Convenient connectivity: WiFi or cellular connectivity can make it easier to check captured photos without repeatedly visiting the camera location.
For users who want detailed wildlife images and convenient local wireless access, the Voopeak TC22 WiFi Trail Camera combines 60MP photo capability, 4K video, and built-in WiFi functionality.
Explore the Voopeak trail camera collection to find a camera that suits your wildlife monitoring needs.
FAQ About Blurry Trail Camera Photos
Why are my trail camera pictures blurry at night?
Common causes include weak infrared illumination, dirty lenses, moisture, low battery power, and animal movement during longer exposures. Clean the lens, check the batteries, and test the camera at different distances.
Why are moving animals blurry in my trail camera photos?
Moving animals can appear blurry because of motion blur, slow exposure times, or delayed camera triggering. Look for a camera with responsive trigger performance and suitable low-light capabilities.
How do I make my trail camera pictures clearer?
Clean the lens, use fresh batteries, select the highest suitable image resolution, adjust camera placement, and avoid direct sunlight. Regular maintenance also helps maintain consistent image quality.
Does a higher megapixel count mean better trail camera photos?
Not necessarily. Megapixels indicate image resolution, but overall photo quality also depends on the sensor, lens, exposure, image processing, and lighting conditions.
Why are my trail camera photos foggy in the morning?
Morning fog or condensation on the lens can scatter light and reduce image clarity. Check the lens and housing for moisture and ensure the camera is properly sealed.
Can cold weather affect trail camera picture quality?
Cold weather can reduce battery performance and may affect camera operation. Use manufacturer-recommended batteries and check power levels regularly during winter.
Final Thoughts
Blurry trail camera photos do not always mean your camera is defective. In many cases, the problem comes down to a dirty lens, poor placement, weak batteries, unsuitable settings, or challenging nighttime conditions.
By identifying the cause and making a few adjustments, you can capture sharper wildlife images and get more value from your trail camera.
If you are looking for a camera that combines high-resolution photos, 4K video, and convenient WiFi access, explore the Voopeak TC22 WiFi Trail Camera and discover more ways to monitor wildlife with confidence.
Ready for clearer wildlife photos? Explore Voopeak Trail Cameras today.

Leave a comment
This site is protected by hCaptcha and the hCaptcha Privacy Policy and Terms of Service apply.